Monday 23 June 2014

Flowers, A Dress, A Truck, and Water !

Hello everyone - I suppose the title could get your imagination going somewhat but basically this post is about my new camera with me supposedly at the helm, but since I don't really feel I've learned a great deal yet about all its workings then any idea of me being in command is sheer illusion - it's the camera that's in the driving seat! Of course the camera can do a perfectly good job by itself - unless I mess about too much with its buttons and bows .. .. .. .. 

However, I am going to show you what I've been up to just recently: this is the first Iris to peak out for us this season, and I love its delicate colours. I shot this just after the rain had stopped .. .. 

  
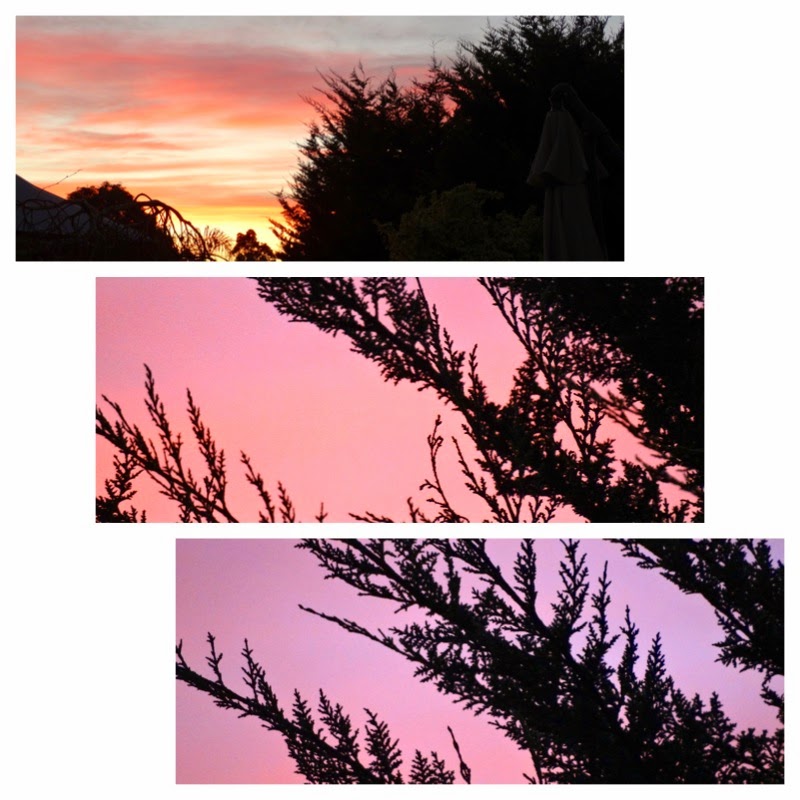
And a couple or so close-ups .. .. 


I have been busy sewing this past week but I can only show you one project as the other is a gift and I need to keep quiet for a couple of weeks!

I finally found a suitable fabric to make up into the 'Kate' dress, the pattern for which came to me as a lovely giveaway from Gilly  - thanks so much once again Gilly, I really enjoyed making this! Of course  if you compare the lovely versions over at Gillymakes with this one then you'll see that mine is a bit larger (make that wider!) as well as shorter for you will note that Gilly is gorgeously slim and a fair bit taller than me - I'm 5'1'' and not quite as slim as I used to be, nevertheless, this is a dress that is suitable for all sorts of body shapes and I've made mine to fit loosely and comfortably. By the way, I love the shape of the pockets although hubby doesn't like me to have pockets in my dresses for I have a habit of sticking my hands in them, which he thinks is not a good look! Tough! I LOVE pockets!


The fabric is a Japanese cotton lawn, very soft and kinda drapey and is a summer weight so, as we are in the midst of winter here and it has been very cold as well as wet, I am not modelling it for you, sorry! But you get the idea don't you - on its own for a warm day and with a skivvy underneath for the not-so-warm ones. These pics were taken with my point and shoot camera, just for comparison.

I have heard a few of you say that you haven't done much dressmaking and so I thought, whilst making up this dress, that it might be a good idea to offer a little tip that I've found useful over the years when one needs to fit sleeves and such like:


You see those two rows of larger than usual (gathering) stitches up there, well, when the pattern instructs you to do that and then tells you to fit that area evenly into a smaller designated space in the sleeve, or wherever, it is sometimes a bit tricky to keep the gathers even but, if you place a pin at each end of the gathered stitches then draw up the fabric to the correct width, you can then wind your threads around the outer pins to hold the gathers to that width while you distribute the fabric evenly. You see how I've figure-of-eight wound the thread round the pins? Yes, it wasn't showing very clearly so I used a turquoise colour just so it would be more noticeable for you. This really helps to keep things in place, as well as even. I hope I explained that clearly!


Recently when hubby and I were out having a drive around some of the back roads locally we came across a rusted out old truck in a paddock and since I didn't have the camera at the time we decided it was worth going back on a nice weather day to get a couple of shots:


And what do you think of the fancy little shed, don't you think that's cute?

The view below is in the same area - farm land, very pretty I think.


The next pics were taken in a picnic drive-in area on the other side of Albany:


And while I was messing around with settings on the camera this old guy came down the river in his canoe so, fair game, we'll 'shoot' him too!


And to finish once again, a couple of garden shots: a succulent, the name of which I have no idea, and my one and only camellia which has more blooms this year than ever, so I think it must like being where  we planted it after being in a big pot for years!


Thank you all for your very interesting and kind comments and a special hello to new followers - you are all most welcome and I'm very happy you're here!

Keep smiling and always be true to yourselves!

With my love,

Joy xoxo

Monday 16 June 2014

My Tree Cushion

Hello everyone - yes, I know I'm very early, it is only three days since I posted and I really wanted to show you this cushion then but including it would have meant my post was going to be much too long and I am mindful of not overloading you all when you have so many other calls on your time. 

But now I can't wait any longer, so here is my Tree Cushion:


I really love this cushion! Well, you know how my stories go - I found another book, yes really, it just jumped off the shelf at me and I wasn't about to put it back. It's called 'The Quilter's Appliqué Workshop' written by Kevin Kosbab, and inside, as well as many other lovely projects, is this darling cushion which the author calls his 'All Seasons Pillow'. I love the way this guy sews and writes - "Why should your work look like it was sewn by a robot? If you're sewing by hand, let it show!"

So off I went - nine squares of white cotton fabric; nine lovely modern-look tree shapes; some basting glue to lightly hold the shapes to the squares; white cotton thread in needle to 'needle-turn' the shapes in place, (which basically means to turn under about a quarter of an inch of fabric with the point of the needle, as you stitch it on); then black embroidery thread to work the trees in various stitches. 


Looking at the pics above, second down, on the right, is one of the appliqué shapes being sewn in place and above that is the little pile of already sewn on and embroidered trees - you can see from their unpressed appearance that I used a hoop while embroidering, which made the job a lot easier. Third down on the right is where I was sorting the best arrangement for the finished project, and of course in the bottom two pics you can see the backing I used - you've seen this one in previous projects I've done.

After prepping each square I then sewed them all together - nine trees on nine white squares - then backed the piece with another layer of white fabric with wadding (batting) sandwiched between. Then came  the quilting which consisted of stitching another square a quarter-of-an-inch inside the final block seams and then free-motion stitching around each tree shape to give them a bit more dimension.

With the front completed I then made an envelope-style back with the 'little houses' print and sandwiched a lovely lacy tape trim around the edge. I made the cushion insert with some lightweight cotton fabric and filled it with toy stuffing, nice and fat and squishy!

The embroidery stitches I used were varied: stem stitch; backstitch; running; fly; fern and French knot.

I know I've said it already, but I really love this cushion and wish I could have come up with the design myself - what a clever man Kevin Kosbab is! It offered a variety of activities and I really enjoyed each one!


I want to make mention too at this time that I have been so inspired by Gill and the cushions she
creates - they are so beautiful and each one different to the next. Gill's workmanship is impeccable - if you haven't visited her place then I would encourage you to go have a look and say hello, she's a lovely person!

I also wanted to show you something else last post but at the time the gift was in the mail on its way to my daughter, Tracy, in Perth and I didn't want to spoil her surprise. She has now received it so I can now show you the new table runner made from some of the Japanese fabric I bought recently. Oh, and by the way, the backing fabric was one I already had .. .. 


 And then with some off-cuts I made some little hearts - these were inspired by the lovely Helen Philipps from her book "Pretty Patchwork Gifts". I have made slight changes, and the heart shape is a wee bit different to that in the book but Helen is without doubt the inspiration behind these - thank you Helen, your work is fab! 


So now my friends, apart from showing you a strange pic from my back garden, that's it for this time; I say 'strange' because although I think it may be termed as a 'bad' shot, I'm showing it because there's just something about it that attracts me - perhaps you'll let me know what you think, and don't worry, I can take criticism and hope to learn from it! I got this shot a few mornings ago when we had a very red sky which was irresistible!


I guess I should show you the red sky too and you'll see that the background to this 'strange' pic is the clump of fir trees behind our place .. .. .. the sky colour was changing so rapidly I had to be quick ..


So now I'll be off until next time - take care and be happy and thank you for being with me once again!

With my love,

Joy xoxo

Friday 13 June 2014

More Birthday Treats!

Hello all you lovely folks out there and thank you for being here with me again! I've really been enjoying all your lovely messages, as I always do: thank you so much!

Gosh, it's almost a month since my birthday - I've really stretched it out and it's all been very lovely! Anyway I'm prepared to put it to bed now - I mean, really, I can't keep this up much longer can I, but I do want to show you a couple of the lovely gifts that I received:  


This is a painting that my artist daughter, Melissa, did for me - I do apologise (sorry Mel!) that my photography does not do it justice - it is a beautifully worked piece but I had difficulty shooting it in a badly lit situation, and attempting to capture it without reflections made the undertaking even more difficult, however it does give you a wee look at one of the types of work she does, and if you'd like to see more then please link onto her here! I am absolutely delighted with this beautiful gift and it really makes a strong statement hanging on the wall! Several people wanted to buy it recently when she had   an exhibition and I consider myself really privileged to be the proud owner, thank you so much Mel! xo


My daughter Tracy also gave me some beautiful surprises, among which are this beautiful stole and book (the gorgeous owl earrings are too small to feature but I'm sure you can imagine a couple of very dainty little silver birds perched on my ears!). The biggest surprise was that Tracy flew down from Perth to spend the day and night with us, and we had a wonderful time together with her and the rest of the family down here. Many thanks to you also Trace! xo


Below are a couple of the birthday salads Mel put together - ahhhh, delicious!


My dear hubby, Jeff, bought me a lovely new camera! What a beauty it is, but so much learning I have to do - and that comes after I've become properly acquainted with it .. .. ..  oh yeah, I'm getting there, little by little! They call this a 'bridge' camera - a step up from point and shoot but not quite a DSLR - that would still be a bit scary for me yet! The professional photographers among you may think I'm a bit daft but I am making some progress, and I'm very keen to learn - any advice gratefully received, thank you!


Look at that 50x optical zoom - it's magic!

Here are some views around Denmark that I practiced on, and, I might add, that magpie was soooooo far away and the camera allowed me to view it better than I could with the naked eye. Yes, okay, I am a bit taken with it .. .. ..


I received a lovely gift from my dear friend Hannapat - thank you so much my dear - Hannapat told me she was sending me a little card .. .. ..  there was considerably more than a card when the package arrived .. .. ..


So in that package I found a lovely card with beautiful birthday wishes enclosed, plus that gorgeous piece of fabric - look at that design, I love it; a lovely decorative hoop for me to fill and hang on the wall, and two beautiful pictures to which I am to add threads, ribbons, etc., however much or little I fancy doing. They already are beautiful and I'm a bit worried that I may spoil them but Hannapat's Ma is a very accomplished embroiderer (among other things) so she is going to send me pics of her work which will give me a better idea of what I should do. These types of works are quite new to me you see, and I've never seen any like them in Australia - although that's not to say they aren't around somewhere, of course!

If you don't already know Hannapat's blog, do pop over and have a look, you will not be disappointed, although I'd better add that Hannapat has been having computer problems these past couple of weeks so hasn't been able to post - we miss you lovely!


I really have been spoiled lately for, apart from celebrating my birthday, I have been fortunate enough to win another lovely gift in a giveaway - this time held by the lovely Robin; she's such a sweetheart too so do pop on over and visit with her if you haven't already; here is the lovely tea towel that Robin so kindly sent me, thank you again Robin!


I haven't yet decided what to make with this lovely thing but I certainly can't bring myself to dry dishes with it. Isn't that little bird paper clip so cute - I haven't seen one like that before - maybe it's a Robin!


I haven't finished yet, please be patient and indulge me: I bought some new fabrics with birthday money, some of which is Japanese cotton which had been imported by Japan Made in Melbourne and oh it is so beautiful! I have been sewing up a storm with some of this gorgeous stuff but can't show you until next post as it may spoil someone's surprise! 


The bottom pic shows the Japanese fabrics quite clearly, and if you look to the top left pic you'll see a collection of various designers' work including Kaffe Fassett for Liberty with those two paisley style prints, and the teapot design, all at great sale prices! I knew Melissa would love the teapots so I made her a cushion this week .. .. ..  


You would probably recognise the backing fabric as one that has found its way into several of my little quilting projects here and there! Didn't it go well with the teapot fabric! And yes, Mel loves her new cushion!


Have you had enough? Too long a post? Just a wee bit longer please, after all I do have a lot of catching up to do after slacking off over the past few weeks .. .. .. 


I just have to show you Mel's lemon tree - it is a Mayer and rarely is it ever without the most juicy healthy fruit .. .. .. 


To finish off, something from my garden from a couple of weeks ago .. .. .. 


Thank you so much, you did indulge me right to the end my friends!

I trust you are all well and enjoying your crafting/gardening/house renovations - whatever is keeping you busy and happy - and I hope the sun is shining brightly for you!

Until next time .. .. .. 

sending my love,

Joy xoxo

Saturday 7 June 2014

Round The Colour Wheel At Last!

A big hello to all of you, thank you for visiting once again, and if you are new to this little space then I welcome you and hope you enjoy what you see here!

I could hardly believe my own eyes when I checked up on when I first posted about my 'round the colour wheel' blanket and saw that it was May last year - a whole year ago, but hey, I have been busy with other things! Anyway, a few weeks ago our weather changed and I started to feel a bit cool at night so you know what happened then - my thought was "I could use a nice cosy blanket around my legs" and you know, one thought led to another and to cut a long story short .. .. .. I pulled this lovely bright and warm article out of its hiding spot, wrapped it over my legs and got busy with the hook! I really was determined that before anything else grabbed my attention, this blanket was going to be finished! And so here it is!


You see all those little ends? Yes? Yes, all those have been sewn in and no, I didn't count them but it was a bit of a marathon I can tell you! The border is done in half trebles, having first of all 'straightened the ripples' at top and bottom with a row of double crochet, half trebles, and trebles in the deepest parts of the curves: you can see that in the first pic to the left, below .. .. .. 


I am really happy with this colourful blanket - it measures 54"x52" (137x132cms.) and really is warm and cosy without being heavy. If you are interested you can see more about its beginnings by clicking on the post in my sidebar entitled Round the Colour Wheel. It's a good feeling to know it's now finished because I did feel guilty about it just lying there, and besides, now I know how much leftover yarn I have to play with, for other projects! AND I can cuddle under it on a night whilst working on other projects!


I have been slack with my posts these past few weeks and the blanket has been finished for a wee while now and I've also been busy stitching:


Yep, another quilt - not a big one - this one measures roughly 25"x35" (64x90cms.)


I have to tell you that I don't really plan out these quilts before beginning on them - I pick up fabrics that take my fancy here and there and then when I get them home realise that 'this goes with that and that goes with this' and just start cutting out strips and follow my intuition, hence the sizes turn out to be what they are - I keep going on the piece until I'm satisfied that it's a useful size, then finish it off. Maybe I'm a bit strange, I know it's not the professional way to go about it, but I do love making them!

I have some really helpful and inspirational quilting books that explain how to work out and measure the amount of fabrics required etc. etc., and I have learned a lot from Jenny at Missouri Star Quilt Company with her great videos on YouTube but so far I haven't taken on the pressure of planning out a quilt with specific measurements .. .. .. one of these days I may change but in the meantime I'm happy with my carefree and most enjoyable method! How do you go about your quilt making? Do tell!


Here's a little lavender heart that I stitched - from Christine Leech's book entitled 'Little Sew&Sew' - the author calls it a 'Hanging Heart'. Oh it does smell so nice; the lavender is some home grown that I hung and dried some months ago after gaining inspiration from the lovely Marianne at Ladybird Diaries; do pay her a visit if you don't already know Marianne - her posts are always so lovely, fresh and inspiring!


Do you remember a couple or so posts back I showed you a wall hanging that I'd made for my younger daughter Mel, for her birthday? Many of you were sure that she'd love it .. .. .. 


.. .. ..  are you convinced now? She loved her cake too! 


I'm including this pic of my blue Kosta Boda tea light holder that my daughter Tracy bought me many years ago - I love this delightful thing but playing around with my camera recently (more about the camera next time) I think I really saw into this ornament for the first time .. .. .. 


.. .. ..  and think it's wonderful, all glowing and shimmering! Such a gorgeous blue too, don't you think?


I have so many other finished projects as well as birthday bits and pieces that I want to share with you  but don't want to keep you too long - I understand completely how quickly time passes whilst browsing through blogs - so I'll finish up with a pic from our back garden - this is one of many available varieties of grevillea, but I'm sorry I can't tell you the actual name of it for I don't know it myself!!! Tut tut Joy!


It is very pretty isn't it - ah, mother nature, what beauty she bestows upon us!


Well, I'm beginning to catch up after all the excitement of anniversary and birthdays and really must try to post again soon before I get myself completely lost with projects and pics happening all over the place! I haven't been very diligent with following your lovely blogs either, just looking quickly and leaving messages here and there, now and again; routine is something I really need else my brain becomes scattered all over the place - not literally of course, that would be too messy now, wouldn't it! But I have been missing you all, and then a feeling of separation starts to seep in, which is not good. So I guess what I'm really saying is - I will see you all again soon, take good care of yourselves and enjoy doing whatever helps you be happy!

With my love,

Joy xoxo